Wanted: New Cards – Easter for Scout Troop Leader

Every Friday from now on, we’ll be showcasing a GCU category that has few or no cards. We’d like you to create at least one card for this category using the Stock Cards function (Bigstock) or your own graphic designs.
Remember, when you’re submitting your new card, add a little note about the intended category in your Notes to Reviewers – cards submitted for underused categories are much more likely to be approved provided they follow the Submission Guidelines. Be inventive, be clever, be creative. Good luck!
Today’s category with only 7 cards is:
Holidays – Easter – For Scout/Troop Leader
Bear in mind that many recognizable aspects of the Boy Scouts of America are copyrighted.

Share this:

Tips and Tricks: Star Submitter

You Can Be a Star … Submitter!
Every card submitted at Greeting Card Universe goes through a review process to ensure the design meets GCU’s submission and marketability standards. Of course, this takes time. It’s hard waiting to learn the fate of new designs. Will the be Accepted? Declined? Returned for Edits? Or will the remain Pending a while?
Is there a way to speed up the waiting time? Yes. If you want your cards approved quickly, you should work toward achieving Star Submitter status.
What’s a Star Submitter? An artist who achieves this status may Fast Track all cards, gaining expedited reviews.
Who Chooses Star Submitters? The Review Team nominates artists whom they believe fit the criteria below.
How Do I Become a Star Submitter? An artist must show – consistently – that their card designs meet marketability standards and conform to GCU’s submission guidelines, contain no spelling or grammatical errors, and avoid mistakes such as design elements over the margin and trim lines. They must use correct and relevant keywords and categories, create good titles and product descriptions in their Artist’s Notes. They must give reviewers all relevant information in their Notes to Reviewer and basically do everything right from the get-go. To become a Star Submitter, learn the rules. Study the GCU Wiki. Understand the guidelines and standards. Make certain your images and verse fit the occasion.
What Do I Get As a Star Submitter? Expedited reviews. All cards are Fast Tracked, so you don’t have to wait long for your new cards to be approved.
Who Can Become a Star Submitter? Anyone! If you apply yourself – that’s the key. Star Submitter status is a reward for artists who have invested their time into mastering the “art” of GCU.
How Do I know When I’ve Become a Star Submitter? When you’re in the process of uploading your card, you’ll see text already in the Note to Reviewer field that says: “I am a Star Submitter so please expedite the review of this card.” Don’t delete the note! You will also find the Fast Track option has been checked. Don’t change it! As a Star Submitter, your submissions receive expedited reviews via Fast Track.
Star Submitters must still follow all Submission Guidelines. They must also continue to include links to website/TOU of any 3rd party elements in their designs.
So if you want faster review times, reduce the errors in your card designs, don’t make silly spelling mistakes, stay in the margins, and learn (and apply) the Submission Guidelines. And perhaps one day, you can be a Star Submitter too!
Share this:

Tips and Tricks: Watercolor Backgrounds in GIMP


Artists who use the free graphics editing program GIMP – we certainly don’t want to leave you out – and want to create their own trendy watercolor backgrounds for greeting card designs may benefit from this video tutorial: How to Create or Make Watercolor Backgrounds in GIMP. You might also benefit from this effect: Making a Watercolor Paint-Photograph in GIMP or How to Convert a Picture to Watercolor. Have fun!
Share this:

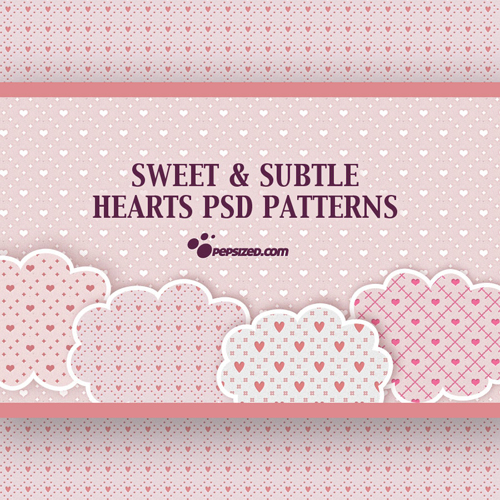
Tips and Tricks: Free High Resolution Patterns
Looking for high resolution patterns to use in your greeting card backgrounds? We’ve got a few sources for you right here with these cool Photoshop Patterns. Be sure to double check the individual Terms of Use/licensing – designers can change their terms at any time – and keep a record of URLs to put in your Notes to Reviewer. Have fun!
![]()
Sweet and Subtle PSD Heart Patterns
5 High Res Watercolor Textures

Share this:

Dash of Inspiration: Ray of Sunshine
A Dash of Inspiration, A Cup of Creativity by Doreen Ray of Sunshine 
As a photographer, I know that those who create through the lens of a camera are in complete control of light within the walls of our studios, but when shooting outdoors, we don’t always have the luxury of observing the light and returning at the perfect moment to capture the image. In this technology rich environment, it’s imperative for the professional photographer to have good post-processing tools, and that we take advantage of all the tips and tricks we can find to help us add character to our photographs we want to be marketable on greeting cards.
Remember, there are a million and one sunset, rose and cute pet photo being submitted to GCU. So what is the key to making YOUR photograph of these common subjects a highly marketable, big selling commodity?
Give it the WOW factor GCU is looking for, that – ‘stop you in your tracks to take a second look’ – factor and you are sure to have created a card that customers will be drawn to and once they look at your card, they can’t resist the purchase.
………………………………………………………………..
Today, I’m passing along some great tutorials to add a little sun to those outdoor images which may need a little something to grab the viewer’s attention. Remember to treat yourself, at least once a month, to learning something new that will benefit your art, card design and ultimate will inspire you to create!
………………………………………………………………..
Creating Rays of Light – Capturing the real rays of light in nature depends a lot on timing, angle and location. When you get it all right, yet still miss those natural light rays, add them yourself.
Create a Starry Night Sky – by Steve Patterson
Master Lighting Effects in PS – By Vince Fraser
Not enough? Still want more tutorials of creating light effects?
25 Powerful Photoshop Light Effect Tutorials by linen
………………………………………………………………..
Here are some freebies for you this week too:
Rays of Light Brushes 2 – By Tijo
Sunburst Brush Set – also by Tijo
Bokeh Texture/BG Pack – by joannastar-stock at DeviantArt READ her TOU
………………………………………………………………..
If you missed our latest Design Challenge post, there’s still time. Entry deadline is February 23rd, so be sure to check it out and submit your design. The winning artist gets some awesome promotion!
………………………………………………………………..
So until next week … Learn … Create … Inspire

Share this:

Wanted: New Cards – Physician Assistants Day
Every Friday from now on, we’ll be showcasing a GCU category that has few or no cards. We’d like you to create at least one card for this category using the Stock Cards function (Bigstock).
Remember, when you’re submitting your new card, add a little note about the intended category in your Notes to Reviewers – cards submitted for underused categories are much more likely to be approved provided they follow the Submission Guidelines. Be inventive, be clever, be creative. Good luck!
Today’s category with only 10 cards is:
Holidays – Physician Assistants Day – General

Share this:

Nuts and Bolts: How to Write Product Descriptions

Artist’s Notes:
How to Write Product Descriptions that Pop
As promised, we’re talking using the Artist’s Notes field to include a product description on your cards. If you don’t know why, check out Nuts & Bolts: Artist’s Notes and Product Description. We’ll wait. Okay, ready? Let’s get started.
Today I’m going to explain to you how to write a product description that pops. Yes, there’s a trick to it. That trick is simple, and at the same time, can be a challenge. You don’t need special training to do it, or a degree, or a black belt in promotion, or any ninja stealth marketing skills.
The most important thing to remember is: write about the card as if you were describing it to a blind person.
That’s what it boils down to. Until you get used to the process, I suggest you take a good look at your card, and just jot down words that describe the design. Here’s an example:

Happy 80th Birthday for Mom – Robin Chaffin
These are the words I’d jot down to describe this card: pink, tulips, tag, gingham, button, swirls, painting, vine. That’s also what I’d use in the keywords, among other things, so I’m killing two birds with one stone.
Now we can turn those random words into a description – for this card, in my Artist’s Notes, I’d say something like: “Celebrate your Mother’s 80th birthday with this pretty pink card with a delicate swirl pattern background, featuring a painting of potted tulips, and a scrapbook effect digital tag with gingham and button accent.”
A couple of things to keep in mind:
1) You have to be careful to avoid deceptive words like gold, glitter, lace, ribbon, etc. as shoppers may believe they’re getting a handmade card, or a card printed with metallic inks, etc. To prevent any misconceptions, use terms like digital, “look” – as in “silver look,” graphic – as in “graphically created glitter,” effect, and so on.
2) Whenever possible, include popular buzzwords in your description. In the example, I wrote “scrapbook effect” for a very good reason – scrapbooking (digital or otherwise) is very hot right now, and I can see that’s the effect Robin was going for in this card design. Just like keywords, it pays to do your research. Not sure how? Check out a previous Nuts & Bolts: Keywords for pointers.
Of course, your space is limited in the Artist’s Notes field, so don’t go completely berserk. If you find it helps, write your description first on a piece of paper or in Word, and tinker around with it until you’re satisfied you’ve ticked all the right boxes.
And here comes a big no-no: Keep in mind this is a product description, not an opportunity to tell shoppers about you, the artist, or give any other irrelevant information. Sure, tell folks where you took that picture of the waterfall. That’s part of the description. But leave out the bit about how you were on a picnic that day, and you got stung by a bee, and took the picture as you were falling into the stream. It’s about the greeting card, not you.
It will take practice, but you’ll get the hang of it. In time, you may even find you’re having fun. Now get out there and start describing!
Share this:

Inspiration Station: Greeting Card Trends


Looking to stay on top of the latest trends in greeting card design? Check out New Greeting Card Design & Printing Trends for some good advice which will benefit both newbies and seasoned artists. Granted, you can’t do much about card sizes and specialty foils, but you can certainly take home a few good suggestions.
Share this:

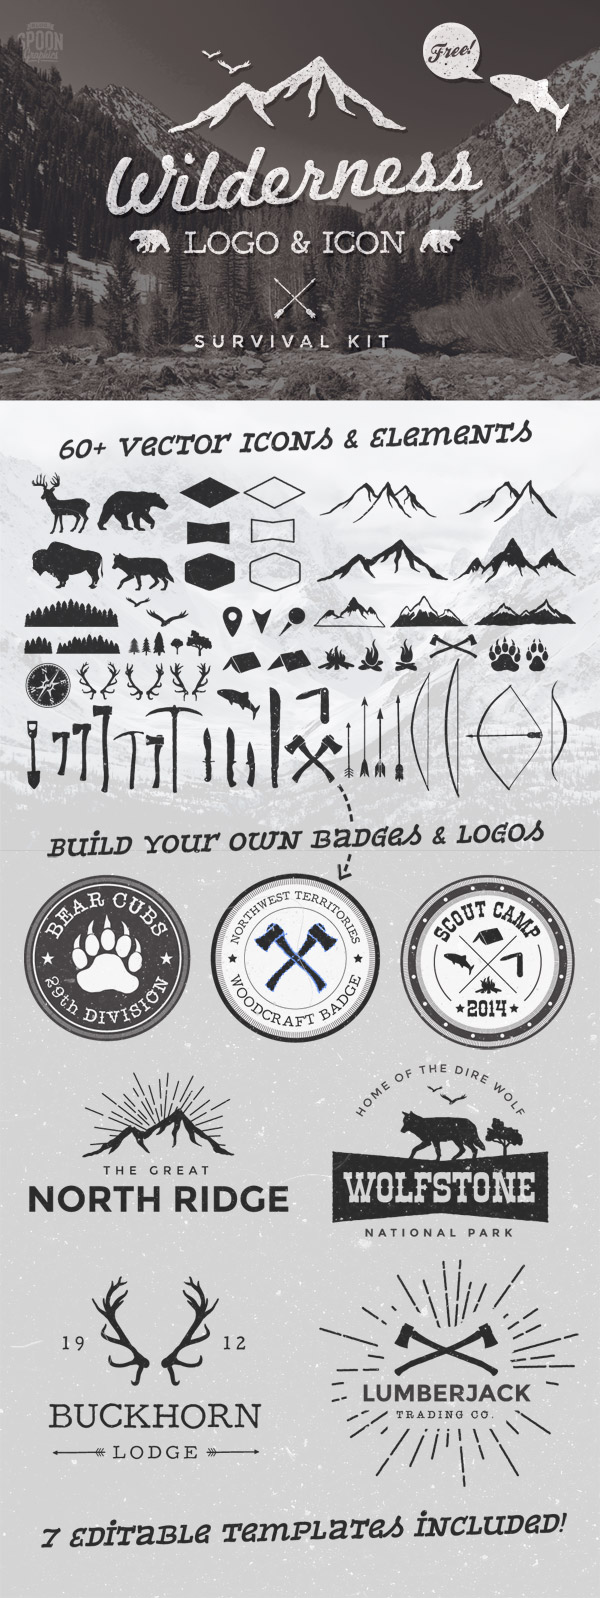
Tips and Tricks: Wilderness Graphics
Spoon Graphics has free Wilderness Graphics, perfect for blackboard type cards (for example). Some truly lovely and trendy images here in silhouette format + links to some useful fonts. Note: I haven’t investigated the TOU for each font. You’ll find his Terms of Use here. Example below. Have fun!
Share this:

Dash of Inspiration: Freebies Week
A Dash of Inspiration, A Cup of Creativity by Doreen Freebies Week
This week on Freebie Week I found a variety of fonts and text ornaments, a vintage mustache collection, a dark elegant set of backgrounds and some masculine color palettes. ENJOY!
………………………………………………..
Matiz font by Beycan Çetin – the ‘rough edges’ on this font, make it a good choice for your chalkboard designs.
Pacifico – is casual handwritten font, great for many designs.
Schoolbell by Font Diner – a fun font for children’s cards
Bergamot Ornaments by Emily Lime Design – very popular in today’s card designs.
>>>> If you are new to using dingbat fonts, read “Who Are You Calling a Dingbat” for some great tips on how to make these fun fonts work as elements in your card designs. <<<<
Vintage Mustache Collection – as always, be sure to read the TOU.
Dark Shadow Patterned Backgrounds by wegraphics.net – The edge shadows are layered and editable within the PSD files and they also come with jpgs for those who don’t have Photoshop.
………………………………………………..
Here are some wonderful color palettes to inspire Father’s Day designs and cards with masculine flare.
Soft Browns with a Hint of Gray
Bold Yellow, Gray and Black
Chocolate Brown, Saddle Brown and Turquoise
Olive Greens with Indigo Blues

………………………………………………………
So until next week … Learn … Create … Inspire!


